


17.7 Photo Export
If you need to export or convert photos to a different format or size, look no further!
No need for any external software any more, let NeoFinder do the job!
Simply select one or several photo files in any catalog of NeoFinder, and open the Context Menu, and select Export Photos to...
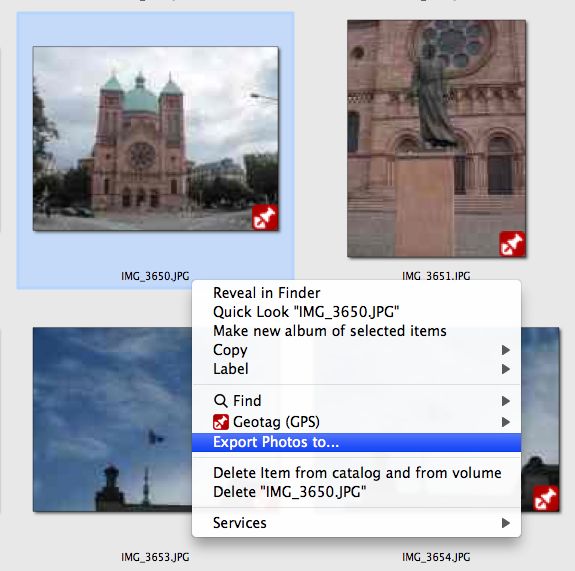
NeoFinder will then ask you for the details in the Export Photo Settings window.
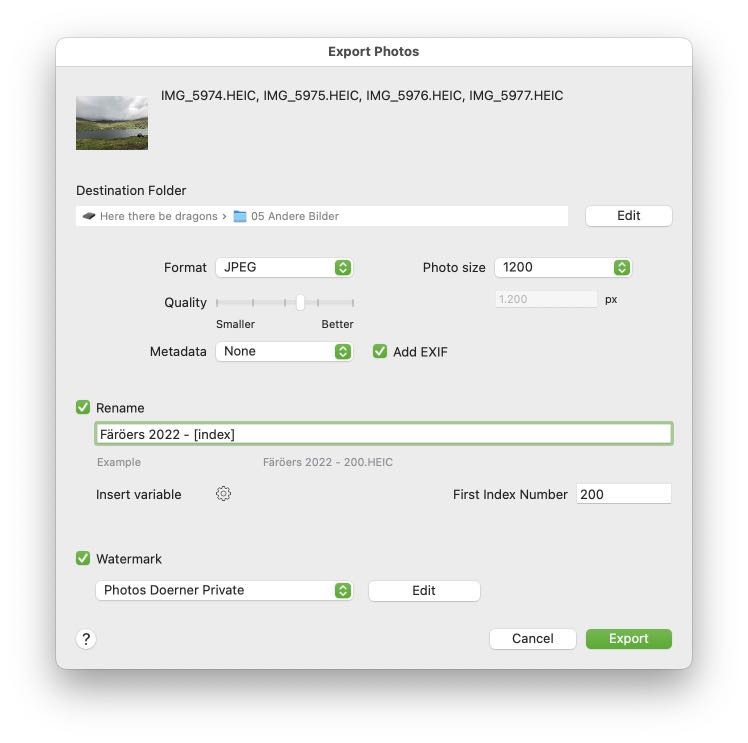
First, you specify the destination folder in which NeoFinder will place the exported files. Use the Edit button to select a different folder.
Next, you specify the photo format you wish to use, currently supported are JPEF, TIFF, PNG, HEIC, and even PDF
If the original volume of your photos is not online, NeoFinder will ask you to connect the device or insert the disk, to be able to read the original photo files.
You can select multiple image sizes, for everything different from the original size, NeoFinder will scale the exported file for you.
Some file formats, such as JPG, allow different compression sizes, which you can select next. The higher the quality number, the better the visual quality, but the larger the resulting export file gets.
In the Metadata section, you can ask NeoFinder to keep the original XMP and IPTC metadata of the original file, or use any XMP Preset you may have defined in the XMP Metadata Presets Editor, or leave all XMP fields empty. Also, you can ask NeoFinder to add the original EXIF data, if you want that.
The Rename section allows you to use a pattern based new file name for the export files, known from the Multi Renamer tool. Or turn off that option and let NeoFinder use the original file names.
Last, the Watermark section allows you to embed a visual watermark in your exported photos. To edit these Watermark Presets, use the new Watermark Editor.
Watermark Presets Editor
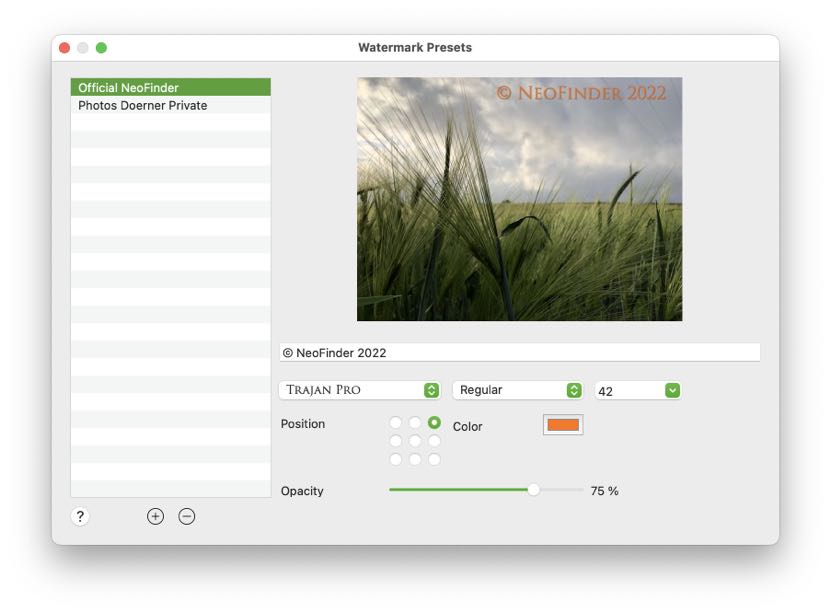
You can define as many presets as you need. Make sure to use good names that will remind you of the purpose of a specific watermark.
Set up the text you wish to use, font, font size, text color, and opacity. And of course, the location where the watermark should appear in your images.
NeoFinder will always show you an example of how your watermark will look like.
Next
17.1 Photo Contact Sheet
17.2 Adobe XMP, EXIF and IPTC meta data
17.3 Lossless picture rotation
17.4 Edit the EXIF creation date
17.5 Truncate JPG files
17.6 Photographer Workflows
17.7 Photo Export
17.8 Astronomy data
17.9 Watermark Presets
17.10 QuickEdit
17.11 Unique Photo ID
5.8 Find Similar Photos