


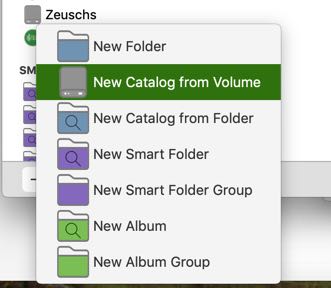
3.1 Catalog one volume
Since cataloging your data is one of the most important functions of NeoFinder, there are multiple way of doing this.
You can use the “Plus” button in the lower left corner of the NeoFinder window. Or use the New Catalog from Volume menu command in the File menu in the menu bar.
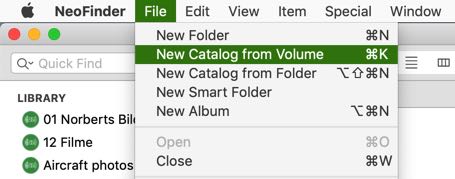
In both cases, NeoFinder will then ask you to select the volume you wish to catalog.
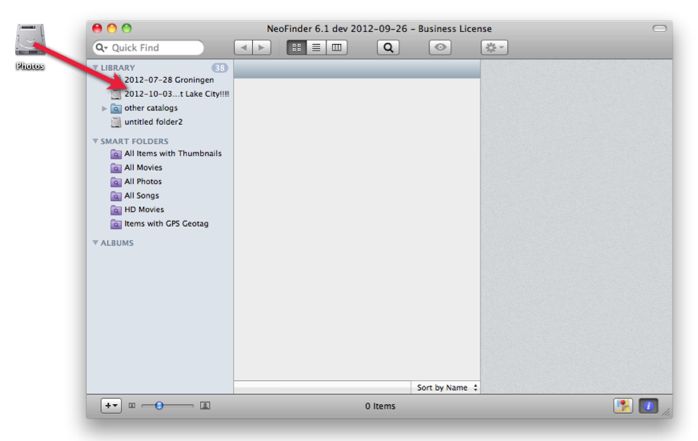
You can also just drag the icon of any volume from your Desktop into the LIBRARY section of NeoFinder:
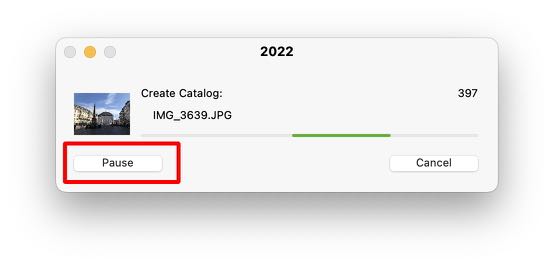
Afterwards, NeoFinder will start to catalog this volume, showing you its progress.
The amazing thing here is that even while NeoFinder catalogs the volume, you can still use all the other features of NeoFinder, as cataloging runs in the background and won't disturb the other features of NeoFinder.
And, gasp, you can even catalog multiple volumes or folders in parallel at the same time with NeoFinder!
Pause and Continue
If you are cataloging a very large server or NAS volume, and you need your network bandwidth for more urgent work, you can ask NeoFinder to Pause cataloging, using the Pause button. NeoFinder will simply wait until you press Continue to keep going with the cataloging process.
Progress Thumbnails
When your are cataloging photos or videos, NeoFinder will show thumbnails of cataloged items in the progress window, if you have enabled the creation of thumbnails for either. That way, you can already see what NeoFinder is doing.
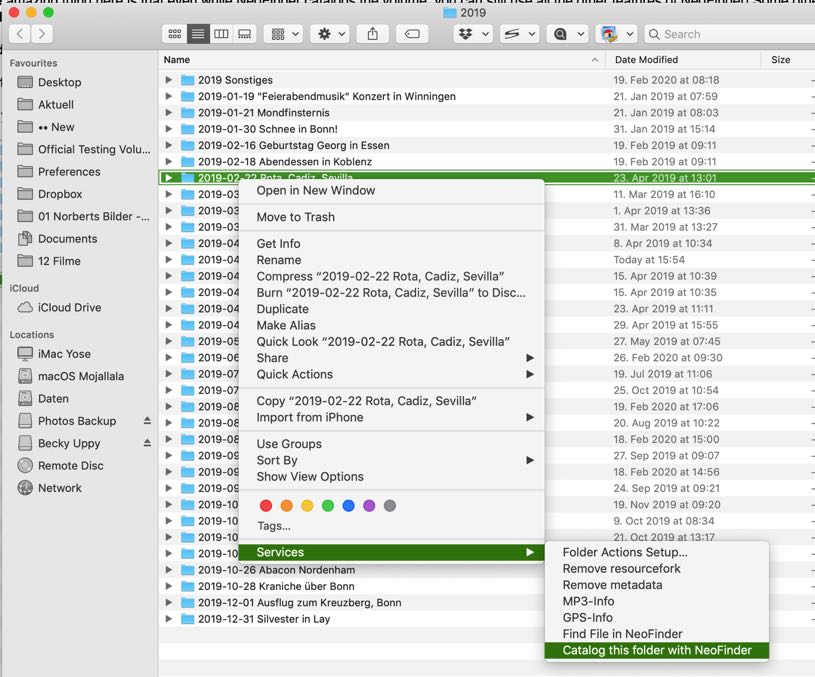
Services Menu from the Finder
You can use the Services menu in the context menu of Apple’s Finder to quickly catalog a volume or just a single folder:
What number is shown in that progress window?
If you catalog an entire disk, and the volume format of that disk offers a total number of files and folders, such as HFS+, but NOT like APFS, then NeoFinder can use that number as an estimate, and counts down.
For other volume formats, or when you catalog a folder, NeoFinder has no way of knowing the number of files and folders up front, so it will count upwards.
When you Update an existing catalog, NeoFinder will use the number of files and folders in that as an assumption for counting.
If the actual number of cataloged files and folders is larger than what NeoFinder has assumed, which happens when you catalog archive file contents, for example, then NeoFinder will start counting upwards.
We tried to make the best guesses and display the most helpful information there in all cases…
Catalog Cloud data?
NeoFinder can natively access a BackBlaze B2 or Dropbox cloud account and catalog your data there.
If you use Google Drive to store data, you can catalog that with NeoFinder if you download and install their macOS software from here: https://www.google.com/drive/download/ NeoFinder 8.3 was specifically updated to work around some strange things that the Google software is doing in the macOS file system to accomplish that. Once the software is installed and works, mount your Google Drive and catalog it like any regular drive connected to your Mac.
Please note that if you ask NeoFinder to generate thumbnails of photos and videos, the cloud software will probably download these files to your Mac so that NeoFinder can read it, which may take some time.

For other cloud services, like Box, OneDrive, Amazon S3, pCloud, you use either their native macOS mounter software, or a tool like MountainDuck or CloudMounter to create a virtual volume on your Desktop with access to your cloud data. Then catalog this volume, or just a folder from it with NeoFinder, just like a regular volume.
What is next?
3.2 Catalog many volumes (Batch Catalog)
3.3 Cataloging settings
3.4 Automatically catalog volumes when they are ejected
3.5 Update existing catalogs
3.7 Cataloging a Folder
3.11 Catalog “cloned” disks
3.18 Securely store your actual media